High Quality & Optimized Low Bandwidth Live Audio Streaming at uStream.tv
High Quality & Optimized Low Bandwidth Live Audio Streaming at uStream.tv and Justin.tv
What you need?
- OtsDJ / OtsAV – serves as input preamp, sound equalizer, dynamic audio processor and audio monitor.
- e2eSoft VSC – virtual sound card for re-routing audio.
- Flash Media Live Encoder with MainConcept AAC Encoder plugin – for live audio encoding to uStream using HE-AAC format.
- uStream RTMP Url and Stream Key
Download link to crack versions (This infringe copyrights and will be deleted in the coming days.)
- Portable OtsAV
- e2eSoft VSC
- Portable Flash Media Live Encoder with HE-AAC option
How do you… in just 5 easy steps
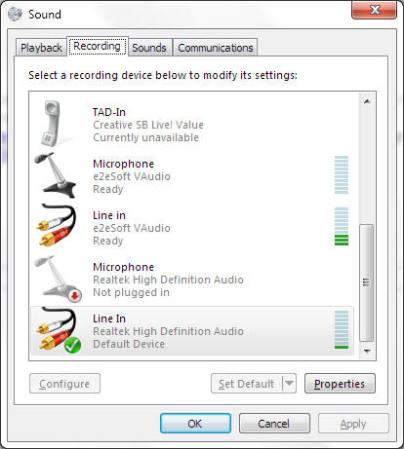
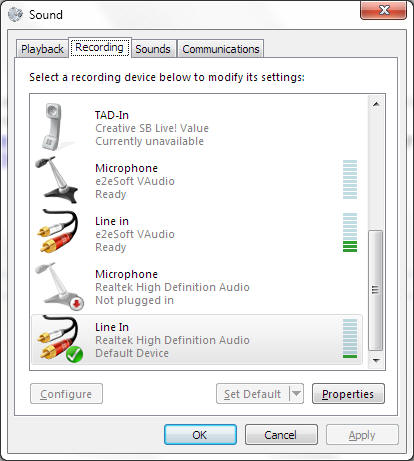
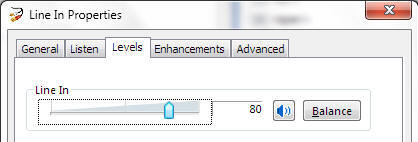
- Connect your stereo audio source via Auxillary or Line In input (Blue port). Then configure your RECORDING DEVICE source. Select a real Line In device (Realtek, VIA, IDT, CMI, Creative) and click Set Default. Click Properties and configure Levels to the most desirable one, not too loud and not too quiet. (Having a high input audio level will cause distorted, clipping audio stream.) If using the Mic input (Pink port), make sure to lower the mic level input and disable the Mic Boost option or set it to Zero level. Accept the setting by clicking Apply and Ok.


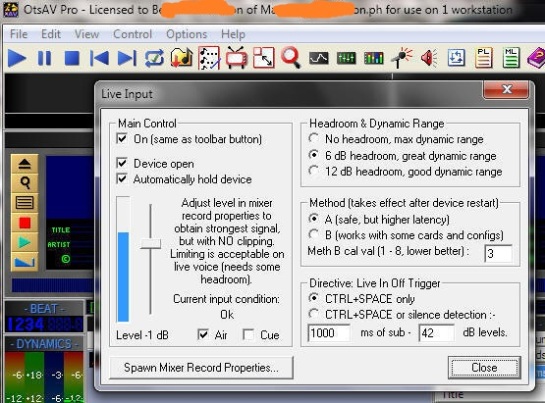
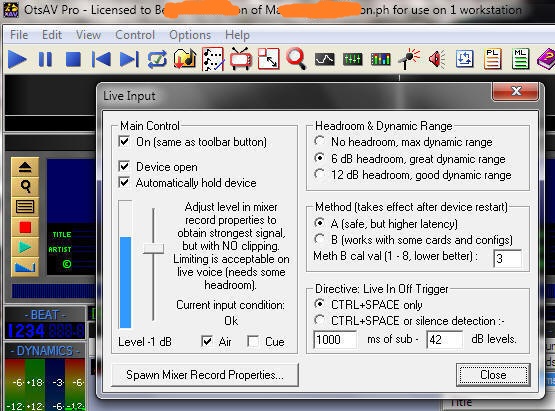
- Configure the Live Input setting of OtsAV. Click Option menu > Live Input > Show Live Input Control Box. Adjust the input Level slider to -1dB however make sure audio input averages to -18dB and output averages to -12dB. (Refer to DYNAMICS indicator below.) Validate the settings by clicking the Close button. You can enable/disable Live Input by clicking the Microphone icon in OtsAV toolbar.
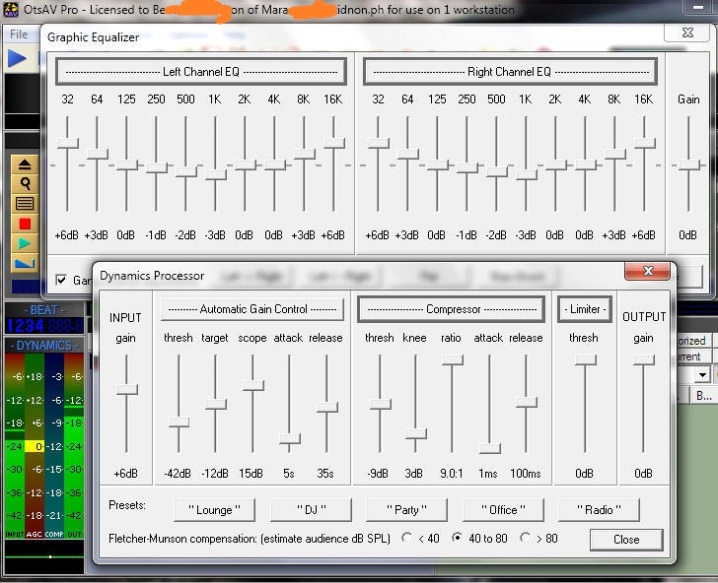
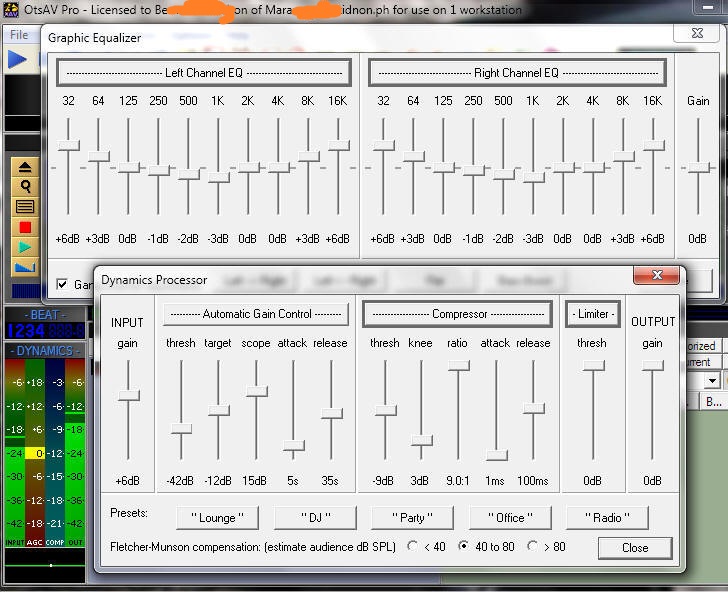
- You may wish to adjust the Equalizer and Dynamic Processor to reach your desired quality audio adjustments. I highly recommend the settings below. You need to disable Automatic Gain Control (AGC) if your souce is already passing though dynamic processing e.g. audio source from an FM radio broadcast. In the DSP settings below, I have choose “Radio” preset but disabled AGC. If your audio source is directly from an audio mixer, simply choose “Party” preset. This activates the AGC, Compressor and Limiter, very useful for maintaining the loudness/level of audio from various sources.
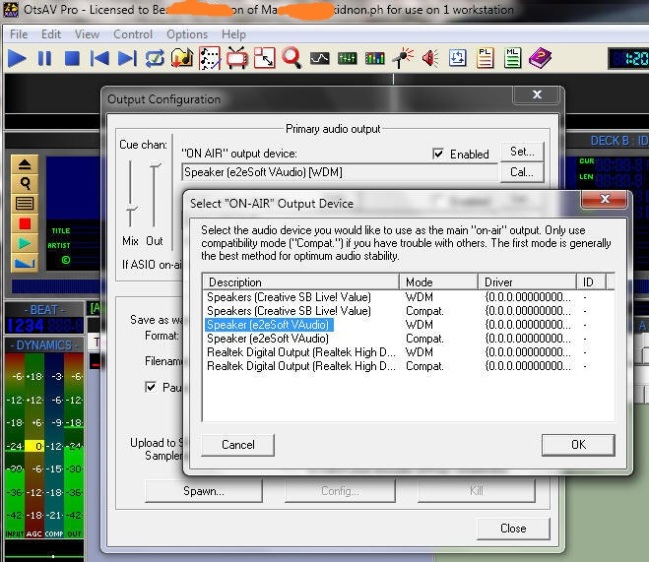
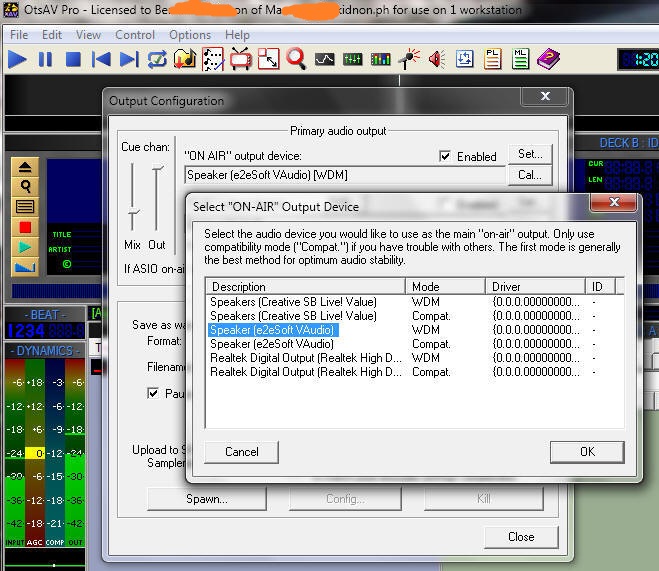
- Now you need to re-route the audio output of OtsAV to the virtual sound card. Click View menu > Output configuration. Select Speaker e2eSoft VAudio WDM as your on-air audio device. If you don’t see the virtual sound card, check if e2eSoft VSC is installed in your PC. You can download a full version from this link.
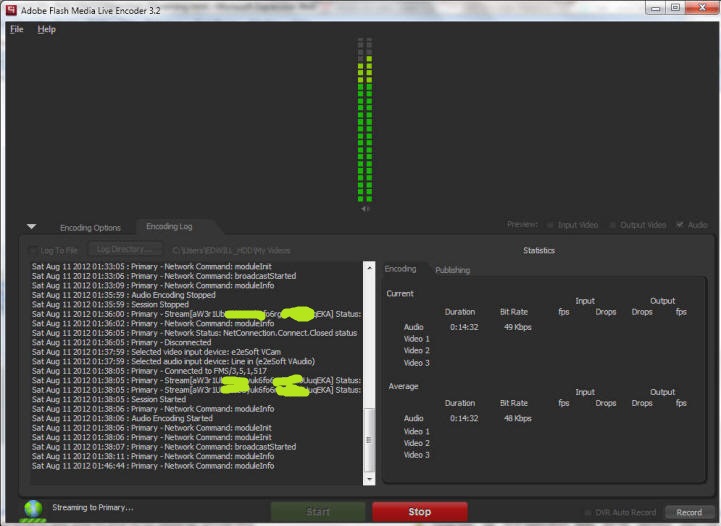
- Launch Adobe Flash Media Live Encoder. Uncheck Video since you will be streaming in audio only. Apply the following settings:
Device: Line in (e2eSoft VAudio)
Format: HE-AAC
Channel: Parametric Stereo
Sample Rate: 44100 (44.1KHz)
Bit Rate: 48 Kbps
The above settings will ensure your audio stream to be in full CD Quality at a very low bitrate. Listeners with poor internet connectivity will still be able to tune in to your stream since it only requires at least 56 kbps connection bandwidth. Parametric Stereo encodes audio data in Mono but will be percieved by listeners as Stereo, restoring all sorround audio information upon decoding.
From your uStream dashboard, click Channel > Remote and copy paste your RTMP Url and Stream Key information to Adobe Flash Media Live Encoder.
You can also stream to Justin.tv using the following information:
FMS/RTMP Url: rtmp://live.justin.tv/app
Stream Key: Login to your account and take it from here.
Flash Media Live Encoder is also supported by other free streaming platform such as Bambuser, Freedocast, BlogTV and DaCast.
You may wish to save your Profile settings for the next use.
Click START to begin transmitting your live audio stream to uStream.


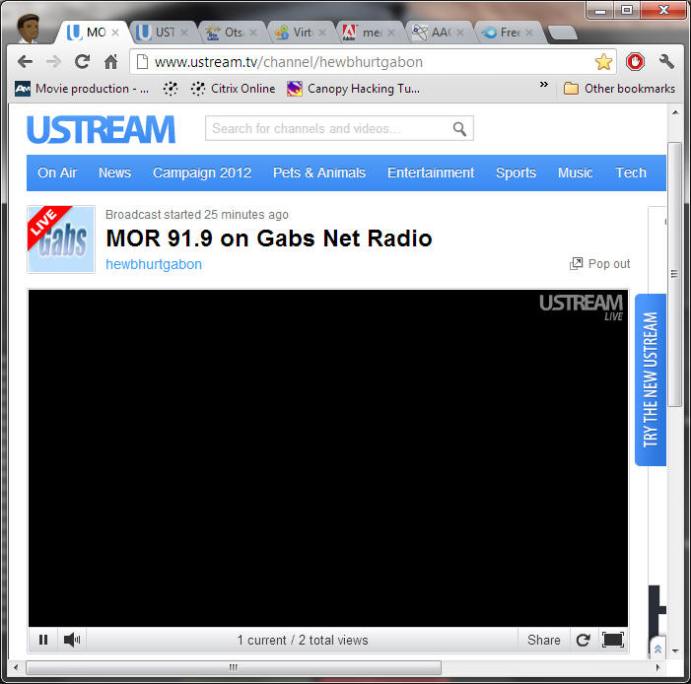
MOR 91.9 on Gabs Net Radio uStream – http://www.justin.tv/hewbhurtgabon
Hope this helps. Good luck!
